


Display It Flex
Price range: $36.55 through $61.91
Display It Flex at a glance
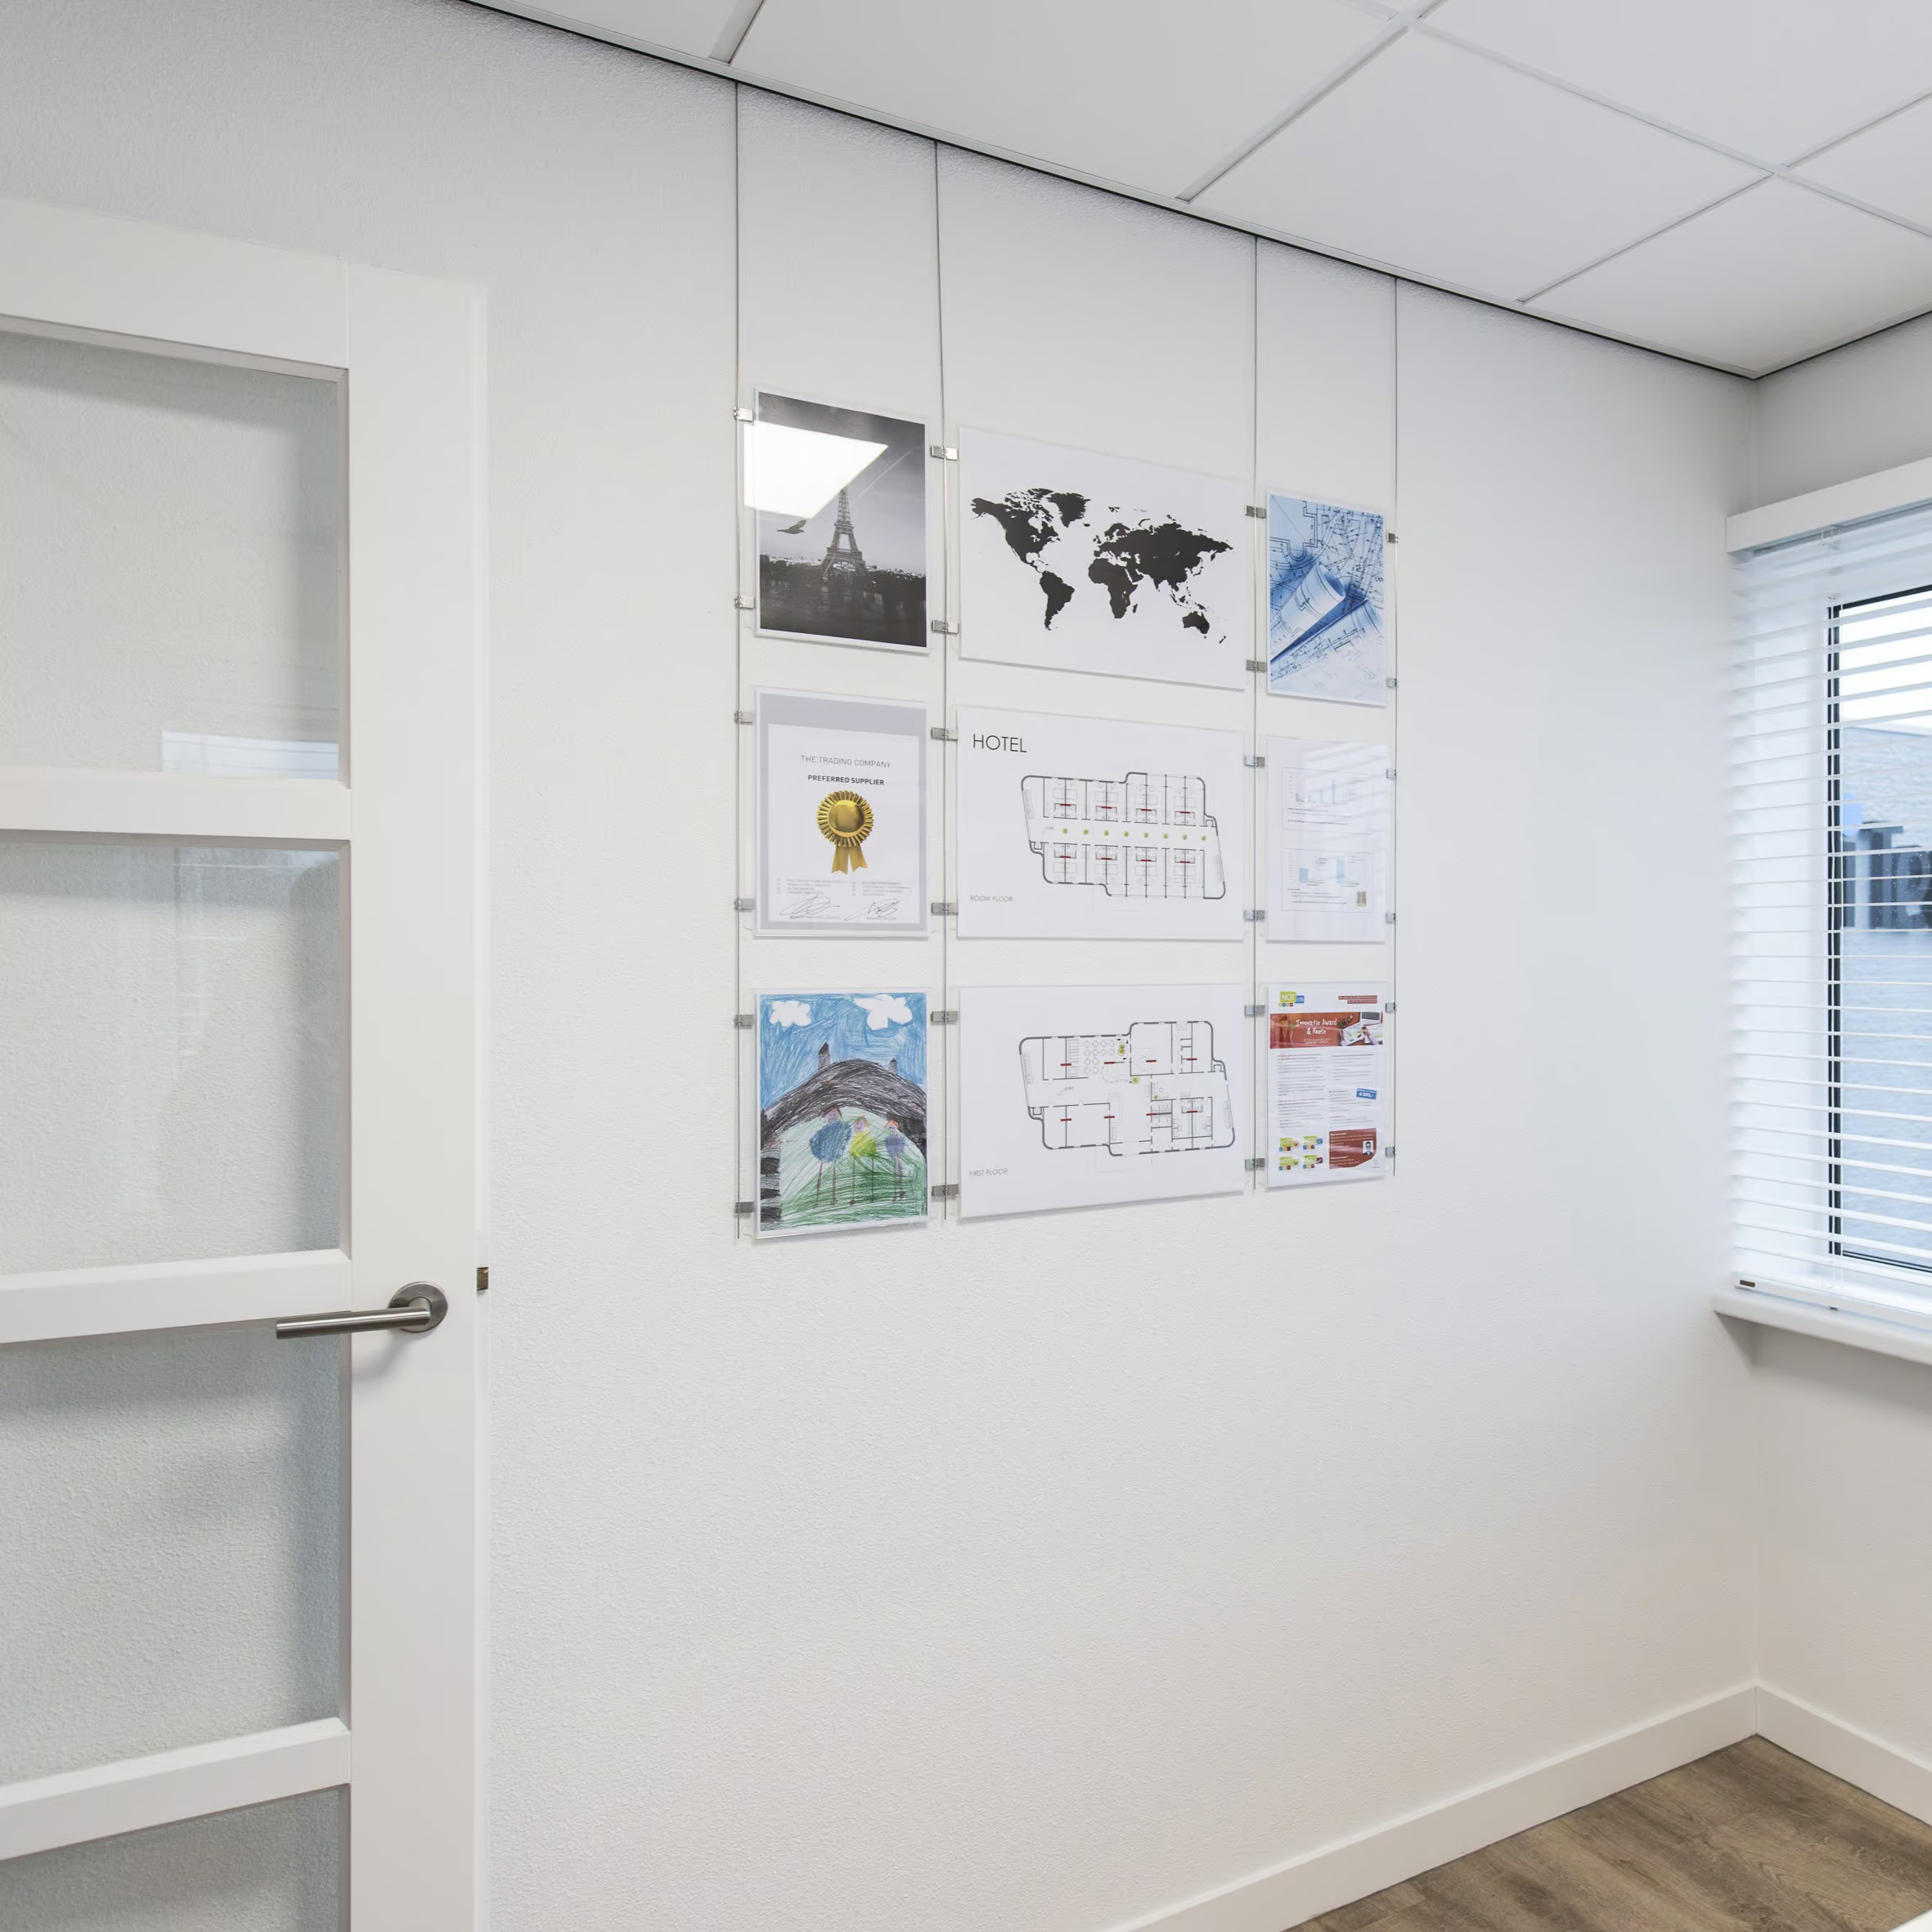
ArtiTeq Display It Flex is the “make it look professional in 5 minutes” display system for documents, photos and announcements. It uses clear acrylic frames that hang from an ArtiTeq picture rail on steel cables, so you can adjust height easily and reposition the whole layout along the rail without making new holes. Available to buy from Hang Logic (Australia’s ArtiTeq importer).
- Professional + orderly: designed to keep notices and documents looking sharp, not “blu-tacked since 2014.”
- Easy height adjustment: perspex pockets are easy to mount and adjust to the desired height.
- Fast content changes: the E-Clip or the 2-4mm clamp let you swap the content in seconds.
- Build grids: the clip system makes it easy to connect frames, so you can create horizontal and vertical layouts.
- Common real-world use: often used for real estate “face walls” and staff photo walls in hospitals and institutions.
- Flex mounting: move your column wherever you like – the steel cables are easy to slide left or right along the picture rail.
- Works with all ArtiTeq picture rails
What an installer says
“I installed Display It Flex at Brighton Football Club so they could showcase their members. It was straightforward to set up, and the result looked clean and professional. The club was stoked they could update the photos easily without calling me back every time someone joined or left.”
Last updated 8 Jan 2026
How to choose the right Display It Flex setup
Not sure where to start? Contact us and we’ll help you think it through and build the right Display It Flex setup – no guesswork, no wrong parts.
If you’re choosing between the two: E-Clips are lighter and cheaper (still a perfectly good option), while clamps are the more upmarket, sturdier choice.
- Choose your picture rail and your cable length.
Setup + swapping content + layout tips
How Display It Flex is built (the simple version)
- Install an ArtiTeq picture rail
- Hang two or more Twister 2 mm steel hanging wires from the rail (each rod becomes a “column”).
- Attach your perspex pockets onto the cable using the e-clips (cheaper) or clamps (and add more frames to create a grid).
- Set the height of each perspex pockets until your layout looks balanced and level.
How to change the content (fast, clean, no drama)
- The acrylic frames open like envelopes – open one and swap the paper/photo.
- Close it back up – the whole point is “seconds, not minutes.”
Layout tips that make it look intentional
- Decide your grid first: A4 for denser info, A3 for “hero” notices.
- Mix portrait and landscape with purpose: pick one orientation for consistency, or use A3 landscape as a header row.
- Use it where updates happen often: real estate listings, staff photos, timetables, safety notices, menus, reception areas.
|
Hang Logic Google Reviews
Preferred worldwide by builders, architects, and professionals.


some of Our CLIENTs

VIC - The Lume Melbourne

NSW - German International School

QLD - Brisbane Convention and Exhibition Centre

ACT- Adina Hotel Canberra
WA - WA Maritime Museum

SA - Adelaide Festival Centre
Show More Clients


Related products


Set Poster Snap
Price range: $71.54 through $108.21Slide-in poster rail set (top & bottom)
Select options
This product has multiple variants. The options may be chosen on the product page

Perlon + Loop 2 mm
Price range: $4.60 through $6.31Pre-looped - just slip it on
Select options
This product has multiple variants. The options may be chosen on the product page

D-Ring Hanger
Price range: $0.25 through $2.64Frame/stretcher D-rings, stable hang
Select options
This product has multiple variants. The options may be chosen on the product page

Clamp
Price range: $6.27 through $9.90Clamps artwork securely to wires
Select options
This product has multiple variants. The options may be chosen on the product page


Info Rail Includes Free Mounting Kit (Save up to $14.31)
Price range: $57.75 through $179.85Slide in paper, card easily
Select options
This product has multiple variants. The options may be chosen on the product page

")
Info Rail Magnetic Includes Free Mounting Kit (Save up to $14.31)
$94.34Magnetic display rail with fun magnets