Installing a Picture Rail: An Interview with Our Installer
Installing a picture rail at ECH (Enabling Confidence at Home) Encore Apartments was more than just a routine job. It was a vital part of bringing this unique inter-generational community to life. In this interview, Greg shares the challenges and intricacies of installing 88 meters of picture rail in the café, library, and community hall, offering valuable insights into the process.
Introduction
Encore Apartments is a pioneering project in Australia. It combines modern retirement living with a Montessori Early Learning Centre on-site.

This unique setup fosters interaction between the young and the elderly, creating a vibrant inter-generational community. As part of this project, Greg Helbig from Hang Logic was tasked with installing a picture rail in various key areas within the complex. In this interview, Greg shares the challenges and intricacies of installing 88 meters of picture rail in the café, library, and community hall.
The Scope of the Project
The installation of picture rails played a crucial role in enhancing the aesthetics and functionality of key community areas. Greg was responsible for installing rails in three distinct spaces: the café, library, and community hall. Each area presented unique challenges, requiring customized solutions to ensure the rails were securely and seamlessly installed.
Understanding the Client’s Vision
Before diving into the technical aspects, it was essential for us at Hang Logic to understand the client’s vision. ECH wanted a space where art could inspire community and connection among residents. The picture rail was not just a functional addition but an integral part of the ambiance they aimed to create. The ability to easily change and update artwork allows the space to evolve over time, reflecting the dynamic nature of the community
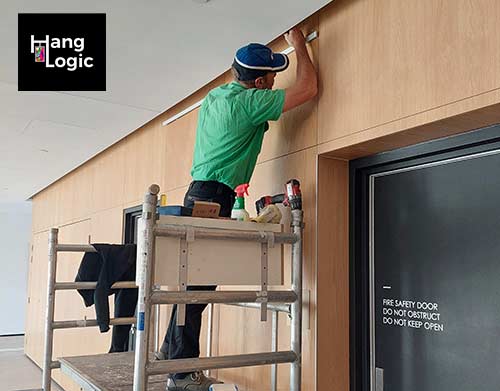
Installing the Picture Rail in the Café
The Initial Challenges
The café, a cosy spot designed to seat about 50 people, was the first area Greg tackled. The main challenge was installing the picture rails above a fixed bench that ran almost the entire length of the walls. This setup made access difficult.

Can you spot the picture rail – it blends seamlessly into the café decor
What an amazing difference when all the artwork is hung.

What the café looked like once the art was hung
The client requested black Artiteq Click rails to match the existing black shadow line at the top of the wall. The aim here was to create a nearly invisible look.
Precision in Cutting and Installing
One significant challenge in the café was cutting the rails precisely to fit around diagonal and 90-degree corners. The side wall, had several windows. This meant that Greg had to cut the rails into various sections. Diagonal walls are particularly tricky because they need a backward bevel cut to maintain continuity.
“When working with diagonal walls, every cut has to be spot on,” Greg explains. “Even a slight deviation can throw off the alignment, making the rail look uneven. The black rail needed to blend perfectly with the shadow line, so precision was key.”

When working with diagonal walls, every cut has to be spot on.
The 90-degree corners were more straightforward, thanks to Artiteq’s corner connectors, but still required careful alignment. “The internal 90-degree connectors make these corners seamless,” Greg notes. “But everything must line up perfectly. Any small misalignment becomes very noticeable, especially with the sleek, modern design.”
Overcoming Material Obstacles
The walls in the café were made of gyprock, a common material in modern construction, but one that can be challenging to work with. Greg used a combination of plastic and metal wall mates, depending on the gyprock’s quality. The plastic wall mates were ideal for areas with sound or fire-resistant gyprock, because they offer strong support without spinning. In contrast, the less dense sections of gyprock required metal wall mates to avoid stripping the holes and losing holding power.
“The choice between plastic and metal wall mates depends on the wall’s condition,” Greg explains. “Good quality gyprock can hold plastic wall mates well. However, when the wall is less dense or inconsistent, metal wall mates are a safer bet. They cut through the material better and provide a more secure hold, ensuring the installation’s integrity over time.”
Maintaining Aesthetics While Ensuring Functionality
A critical aspect of this installation was maintaining the aesthetic integrity of the café while ensuring functionality. The client wanted an almost invisible picture rail, so every detail had to be meticulously planned.
“In modern, minimalist spaces, you don’t want the picture rail to detract from the overall look,” Greg recalls. “The black rail blended seamlessly with the existing décor, but this also meant any mistakes would be glaringly obvious. The pressure was on to get it right the first time.”
Adapting to Unexpected Challenges
As with any installation, unexpected challenges arose. For instance, the café’s windows required the rails to be cut into multiple sections, adding complexity.
“Every time you cut a rail, you introduce a potential point of weakness,” Greg explains. “Each section must align perfectly with the others, and the joins should be as discreet as possible. It’s a bit like piecing together a puzzle, where every piece needs to fit perfectly.”
Tackling the Library Installation
Installing a Ceiling Rail
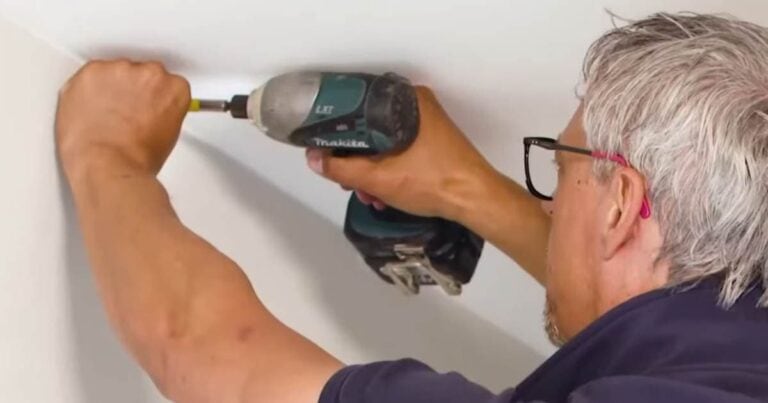
The library posed different challenges, with the client requesting a rail along the ceiling for free-hanging art displays. Installing a ceiling rail (the Artiteq Top rail) is never straightforward, and this was no exception.

The inspection hole helped Greg find the top hats he required to ensure solid fixings
The first step was determining where to fix the rail. An inspection hole near the installation site revealed a top hat section supporting the ceiling, running at 90 degrees to the rail. This discovery was crucial.
“Installing a ceiling rail is always tricky because you’re dealing with gravity. You need to make sure the rail is secure enough to hold the weight of the art without sagging or detaching. The top hat section was a lifesaver in this case. It provided a strong anchor point for the rail.”
The Role of Inspection Holes
Using a laser level, Greg marked a straight line across the ceiling as a guide for the rail installation. However, the irregular spacing of the top hats, due to obstacles like downlights, added complexity. Instead of the standard 60 cm intervals, these top hats were spaced randomly. Greg therefor had to locate each one through visual inspection and test drilling.

This sheet shows the top hole locations – not your usual 600mm apart!
“It’s a bit like detective work,” Greg says with a smile. “You have to figure out where everything is hidden behind the ceiling because you can’t see it directly. I had to do a lot of manual checking, by that I mean drilling into the ceiling to discover where the top hats were.”
After identifying and recording the fixings, Greg pre-drilled the necessary holes in the top rail.

Greg pre-drills holes into the top rail prior to fixing it to the ceiling before securing it to the ceiling.

Greg screwing the Artiteq Top Rail to the ceiling
The process was meticulous but essential for ensuring a stable and secure installation. “Pre-drilling the holes is crucial,” Greg explains. “It ensures that the screws go in straight and that the rail sits flush against the ceiling. Any deviation can create gaps or cause the rail to hang unevenly.”

Greg never got to see this – the Artiteq ceiling attached picture rail, the Top rail, in use!
Dealing with Textured Walls
In addition to the ceiling rail, the library walls presented their own set of challenges. The walls were made of gyprock with a cement render on top, giving them a rough, textured finish.

Greg attaching the Artiteq Click Rail to the cement rendered library wall
Drilling into this material quickly wore down the drill bits. Greg did however manage to complete the job with a single drill bit. It was completely destroyed by the end! “Cement render is tough on drill bits,” Greg notes. “You have to be patient and let the drill do the work without applying too much pressure. Otherwise, you risk breaking the bit or damaging the wall.”
The rough texture also made it hard to insert the fixings. That’s why Greg had to use metal wall mates. These were strong enough to cut through the tough render, ensuring that the rails were securely fixed to the wall and would not flex or loosen over time.
“The key to a successful installation on textured walls is to use fixings that can grip the surface,” Greg explains. “Metal wall mates are ideal because they cut into the render and create a strong bond. This is essential for holding the rail securely.”
Ensuring Long-Term Durability
Greg emphasizes the importance of securing the fixings tightly to prevent any future issues. “When you’re installing a system that needs to hold weight over time, you have to think about the long-term durability,” he says. “If the fixings aren’t secure, the rail could start to flex or sag. This not only looks bad but also compromises the safety of the installation. By using metal wall mates and ensuring they were properly seated, I was confident that the picture rails I installed would stand the test of time.”
Maintaining the Integrity of the Design
The library, with its rough-textured walls and sleek, modern design, called for a careful balance between functionality and aesthetics. Greg ensured that the picture rail was both effective and unobtrusive. This meant the focus would remain on the art and the space itself.
“In a setting like this, you want the picture rail to do its job without drawing attention to itself,” Greg explains. “It’s about enhancing the space, not detracting from it.”
The Community Hall: A Smoother Installation Process
Initial Setup and Adjustments
The installation in the community hall was more straightforward. With no fixed furniture in the way, Greg had easy access to all the walls with his mobile scaffolding. The main challenge here was the client’s request for additional rails beyond what was originally agreed upon. This meant a trip back to the warehouse to pick up more picture rails. Greg was also concerned about drilling near a retractable screen. This meant he could potentially hit electrical wiring or metal bracing. He therefore consulted the architectural plans, which allowed him to complete the installation without incident.
“The community hall was a welcome change of pace after the café and library,” Greg admits. “There were fewer obstacles to work around, which made the installation process much smoother.”

Here’s what the picture rail in the community hall looked like the following week.
Ensuring Safe Installation Near Electrical Components
A key concern whenever you are installing a picture hanging rail is hitting electrical wiring behind the wall. “Whenever you’re drilling near electrical components, you have to be extra cautious,” Greg explains. “The last thing you want is to hit a live wire. Fortunately I could review the architectural plans and double-check everything before proceeding.”
Unexpected Challenges
One small hiccup occurred when Greg accidentally picked up the wrong colour rails from the warehouse. However, this turned into an opportunity for Jacqueline, the business owner, to visit the site and see the progress firsthand. Once Greg had the right coloured picture rails he completed the installation in the community hall. Thanks to rails it had now become a flexible and attractive space for the residents to display their paintings. The upcoming SALA (South Australian Living Artists) Festival was their first opportunity.
“This kind of mistake is frustrating, but it happens,” Greg reflects. “The important thing is how you handle it. In this case, it was a simple fix, and it gave Jacqueline a chance to see my work. Plus, it reminded me yet again how important it was to double-check everything before heading to the site.”
The Importance of Flexibility in Design
The community hall was designed to be a multi-functional space, used for various events and activities. The picture rail needed to be flexible enough to accommodate different types of artwork and displays.
“Flexibility was a key consideration for this installation,” Greg says. “The client wanted a system that could be easily adjusted to suit different events, whether for the SALA Festival or another community gathering. We made sure to install the rails to allow for easy reconfiguration, so the space can be adapted as needed.”
Conclusion
Installing a picture rail may seem straightforward, but as Greg’s experience at Encore Apartments demonstrates, it requires careful planning, technical skill, brains, and adaptability to overcome the various challenges. From navigating fixed furniture and textured walls to finding top hats, aligning ceiling rails and managing unexpected client requests, each installation area presented unique difficulties.
Success in such a project lies in the details—the careful selection of materials, the precision of the cuts, and the consideration of both aesthetic and functional needs.
In the end, the result is a series of spaces that are visually stunning, practical, and adaptable. The picture rail allows the art to take centre stage, enhancing the ambiance of the café, library, and community hall, and creating an environment that truly reflects the spirit of the Encore Apartments community.