Track Lighting: How to Install and Use the Artiteq Combi Rail Pro Light

Introduction to Lighting Tracks
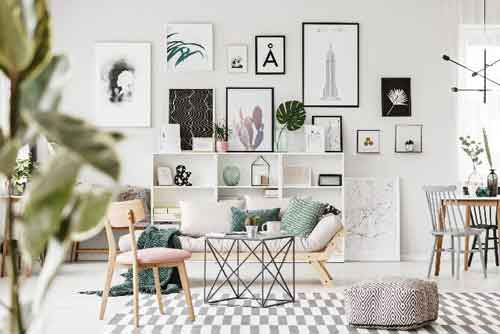
Homeowners spend considerable time selecting the perfect furnishings and deciding the best shades for their dream home. However, they often tend to overlook lighting. Yet, lighting can easily make or break any home, office, or art gallery look. The best lighting tracks can lift the charm of your interiors; inadequate lighting can turn even the most well-designed rooms into dreary settings. While lovely ceiling lights and stylish chandeliers do capture the visitors’ attention, track lighting not only has an appeal of its own, but it can also turn out to be a more practical solution.
Why Lighting Tracks?
The track lighting is a great way to illuminate your home without taking up too much space. This type of light can be installed in any corner that needs some extra attention, and with its ability to vary intensity levels from low soft glow all the way up into harsh directional pinpoint sources, it’s perfect for just about every room! Here we discuss the system designed by Artiteq, a leader in the manufacturing and worldwide sale of picture hanging systems, lighting tracks included.
Track Lighting: Introducing Artiteq Combi Rail Pro Light
The Combi Rail Pro Light is not just a track lighting but a flexible picture hanging system that includes picture lighting. The system consists of a wall-attachable aluminium rail whose elegant, discrete design beautifully merges in any room.
Just as a normal picture rail, the Combi Rail Pro Light is used in combination with Twister Hanging Wires and Micro Grip Hooks or Ratchet Hooks. You will be able to slide the wires along the whole rail’s length as well as sliding the hooks along the wires, for optimal adjustment of your artworks, photos, drawings, etc.
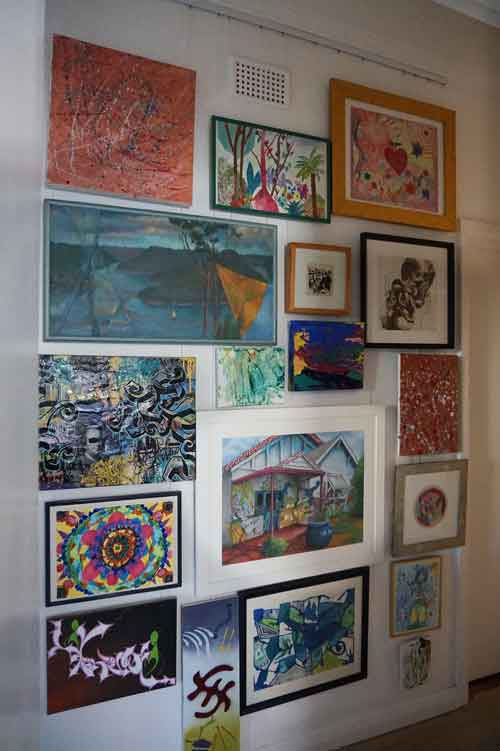
This amazing system allows you to replace your wall-hung items easily and as often as you wish: feel free to rotate your paintings periodically in your art gallery or change the arrangement of the furniture in your private room or office. Everything else will just follow. No more holes/patches in the wall will be required.
And what’s more, thanks to its sturdy design, the Combi Rail Pro Light can withstand up to 50Kg of weights per meter!
This picture hanging system has movable light fittings that can easily sled along the rail: it is thus possible to illuminate individual pictures, paintings, and photos with optimal, high-quality lighting.
The Combi Rail Pro Light installation can occur easily and without the need for special tools or techniques.
Curious to know how to install the Click Rail Pro Light? Keep reading the following.

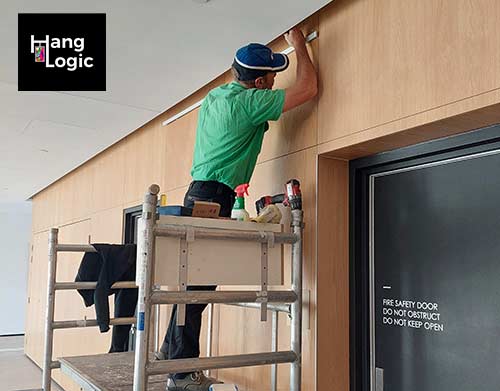
Track Lighting: How to Install Artiteq Combi Rail Pro Light
The Artiteq Combi Rail Pro Light can be installed in 3 quick steps:
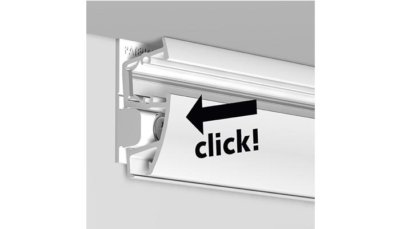
Just like all the wall-attached Artiteq’s rails, the Combi Rail Pro Light is attached to the wall using heavy-duty Nylon clips (the Click and Connects).
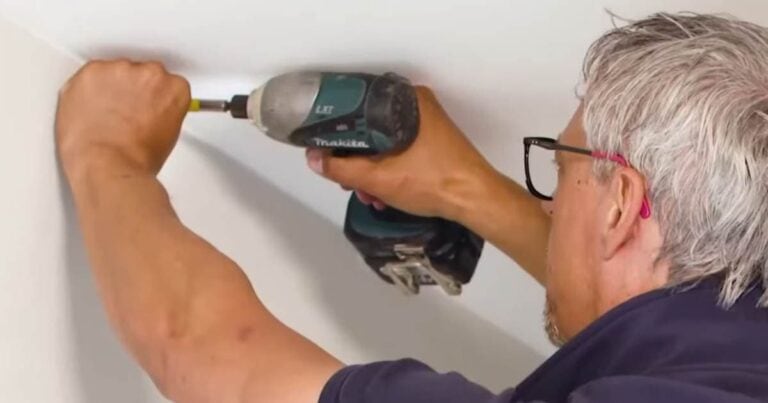
Mark and drill the holes where the Click and Connect will need to be installed. You can also use these connectors as a drilling template. Make sure that you drill at least 10cm from the edge and allow a max of 40cm space between each clip. This is very important to ensure your rail can withstand the maximum load capacity of 50Kg/m.
Once the drilling is performed, you must attach the clips to the wall employing screws. Click and connects and screws are supplied together with the rail and are part of its Install Kit.
In terms of how to secure the clips to the wall, a number of scenarios are possible:
- Plaster walls: you will use plaster wall-anchors to attach your clips to the wall.
- Concrete or masonry walls: you will use concrete/masonry wall plugs to attach your clips to the wall
- Timber walls: you will use timber screws to attach your clips to the wall

In presence of a timber/steel framed building, it is always advisable to refer to framing plans or, alternatively, use a stud finder to detect structural elements behind the plaster. This strategy will also help detect possible water conduits or power lines you don’t want to accidentally drill in. It is advisable to attach your rail to structural elements like studs whenever possible.
Fixing the rail to the wall:
Once the Click and Connect are in position, simply click the rail onto them. The use of a rubber mallet is advisable.
Step 2: Connect the Lighting Track to the Power Supply.
Ends of the track:
Both ends of the track are to be closed by caps. The end caps are simply pushed into the track. If necessary, tap in carefully using a rubber mallet.
One end of the track will be used to connect the power supply. This is done using a dedicated plate which is to be screwed onto the endcap.
Is it possible to connect more lighting tracks together?
Yes, it is possible to connect multiple tracks in one block.
You can connect up to five individual tracks in one block, for a maximum length of 8 meters. You will need to install a new block if you want to cover longer lengths.
The electrical power travels along the track/group of tracks using a metal strip that runs in a dedicated channel in the rail.
To connect two tracks together, you will need to place an insulation plate next to one of the Click and Connects, between the two tracks. The insulation plate is essential to make sure that the power is exclusively conveyed in the metal strip and nowhere else in the rail.
The insulated plate is included in the install kit supplied with the rail.
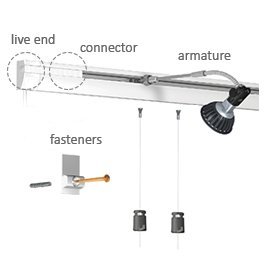

To electrically connect two adjacent lighting tracks, you will need to place a connector in the channel where the metal strip is. It is important to insert the connector in a centred position between the two tracks and press, or if required, carefully tap on it using a rubber mallet.
The connector will then act as a safe bridge to convey power from one track to the adjacent one.
Corner Mounting:
You can also connect two rails on a corner:
You will place the corner piece at 90 degrees between the two tracks. It is essential to always put the insulation plate in place when linking the rails, which means that at the end of the system you will always need to fit an end cap. The connection of each corner occurs by means of multi-connectors, which are 90 degrees bent connectors. These are installed in the same way as the straight ones, inside the dedicated channel in the rail, where the metal strip is.
Step 3: Installing the Track Lighting Fittings.
The Track Lighting Fittings are the component in the system which delivers light to your pictures!
The fitting consists of an LED or Halogen Lamp connected to a flexible bracket using two socket screws. The fittings have an adjustable body that can be moved to various positions to ensure the lighting is directed to the spot you need to enlighten.
The bracket is provided with a metallic head at its end, which is to be inserted in the groove of the rail, where the metal strip is. The flexible bracket is then connected to the rail with just one-quarter of a turn. This ensures mechanical and electrical connection at the same time.
You can position the fittings anywhere along the rail. The fittings are suitable for both LED and halogen lamps and available in 50 cm and 70 cm lengths.

Track Lighting: Quality Requirements and Product Warranty
Artiteq has its own Research & Development department, which makes it possible to develop all its products with a Safety Factor of 3.
What is a safety factor?
In simple words, this means that you could triplicate the normal load before experiencing failure of the component. For example, if a track is designed with a safety factor of 3 and it is rated for a maximum 50Kg/meter, it means that you would experience failure of the system under at least three times the maximum rated load (50 x 3 = 150Kg/meter).
However, this doesn’t mean that you should exceed the maximum load. The point of using a safety factor is to get you covered whenever the maximum load was to be accidentally exceeded and for short amounts of time only. Your system won’t break if you accidentally overload it with 55Kg/m for a short while (a few minutes). However, if you keep overload permanently, permanent damage may occur. For permanent damage/failure, it is intended either a permanent deformation of the rail or failure of the wall fixtures or possibly both things.
There are products in the Artiteq’s range that are more critical regarding safety. This is the case with products that hang in open spaces rather than against walls. The use of specific materials can also influence the safety factor. In these cases, it can even be five or higher.
Artiteq has its Quality Control department as well. Both functional requirements (behaviour under load) and the appearance of the final products are closely tested to ensure compliance with the quality assurance of TÜV on all their products.
All Artiteq’s hanging rails, hanging wires and hooks are TÜV certified and guaranteed for a 10-year guarantee on all its products.
For the Combi Rail Pro Light, Artiteq declares that this product fulfils the applicable guidelines following standards EN 60598-1 / EN 60598-2-1 / EN 60570 / EN 55015 and EN 61547.
When opting for Artiteq’s built-in picture hanging systems, it is important to understand that picture rails are not to be considered structural elements of a building’s construction.
This means that the picture hanging systems are not designed to carry the construction of ceilings, for example, or any other load coming from a building’s structure. The picture rails are designed solely to hang wall decorations, paintings, photo frames, etc.

Lighting Tracks: Who Can Install Them?
The Combi Rail Pro Light is designed to be extremely easy to install. Nevertheless, it may be advisable to consult a professional, such as an art installer and/or a licensed electrician where electrical work is to be carried out.
Time for an upgrade?
Are you looking to know more about how you can improve the beauty and efficiency of your rental property, private home, office, etc.?
Whether you want something simple to keep your walls tidy and pristine or comprehensive systems to create an impressive art display, we are just a phone call away.
Contact us today by calling us on 0432 924 305 or email us at team@hanglogic.com.au for a FREE consultation. Or, if you prefer to work things out yourself, sift through our frequently asked questions.