Modular Wall Display: How to Create One for your Documents and Arts

Modular Wall Displays: The Importance of Decluttering
Decluttering goes far beyond refining the look of your home or work space. It’s vital to both your physical and mental wellbeing.
Whether it’s dirty pans piling up in the sink or piles of papers stacking on your desk, all of us have experienced at least once in own life the negative effects of clutter. Not surprisingly, untidiness in our physical spaces can have negative effects on our mental health. As more objects occupy our space, they find a way to seep into our brains, and overtime, lead to higher levels of stress and anxiety.
When you eliminate the excess clutter from your life, you may feel the positive effects it has on your mental health and overall wellness. Many researches in the field of psychology have proven the importance of clearing out your space in various areas of your everyday life. To preserve your overall health and happiness, you should take steps to declutter your life and start seeing the positive changes that take place.
Perhaps you may start from your work place, home office, or the areas in your house which are more prone to this problem (e.g. Kitchen, kid’s rooms).
In this article, we will talk about Modular Wall Displays. A fantastic solution that you can use to defeat one of the most powerful exponents of clutter: paper.
Want to know how? Keep reading.

Modular Wall Displays: What Are They?
Modular Wall Displays are a way to display your documents on your walls, in a manner that is flexible and easy to use.
How are they made?
The simplest system we are going to talk today is the Info Rail by Artiteq.
The Info Rail is a wall-attachable aluminium extrusion, fitted with an internal rubber triple-grip system. This system allows you to hang paper and carboard up to 80gsm in weight and 2mm in thickness.
All you have to do is insert you document in the groove in the rail and your document are instantly on display.
With Info Rail, you can have your papers neatly displayed on walls, rather than stacked in piles or trays on your desk.
The Info Rail completely eliminates the need for blue-tac, sticky tape, pins, nails, and similar. All these items are likely to leave marks on your walls. In most cases, they even cause entire portions of plaster to come away from the wall, which later need repairing.
With the Info Rail in place you can hang and replace your documents as often as you need, and your home or office walls will remain undamaged.

Modular Wall Displays: What Can I Hang?
A number of our customers, both private homeowners and businesses, have used Info Rail to:
- display pricelists in their retail shops
- use Info Rail to display floorplans of their projects to clients and staff
- use Info Rail to display patients’ clinical information to staff in healthcare facilities. Larger organisations also use this system to display maps and directions to visitors and guide them through the correct department.
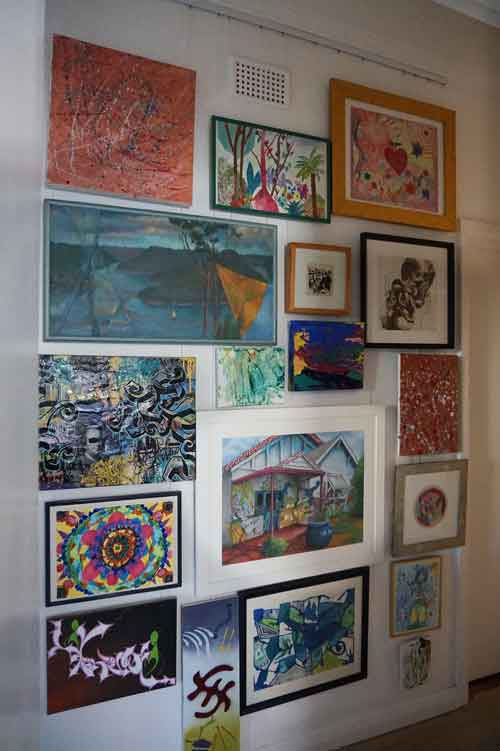
- display children artworks, as well as educational illustrations in schools. They love the Info Rail system because it eliminates the need for screws, pins and nails, resulting in a safer and better organised living space for children.
- display communication from the management, food stock situations and re-orders, invoices from suppliers, etc in Commercial kitchens
- tidy up their children’s rooms and hang their artworks and photos at home.

All in all, you will probably agree that it doesn’t make much sense keeping your documents, photos, artworks, messages to staff stacked in a pile on your desk. It is a way better solution to have them displayed on walls where they can actually be seen and serve the purpose they are meant for!
Modular Wall Displays: How Can I Install One?
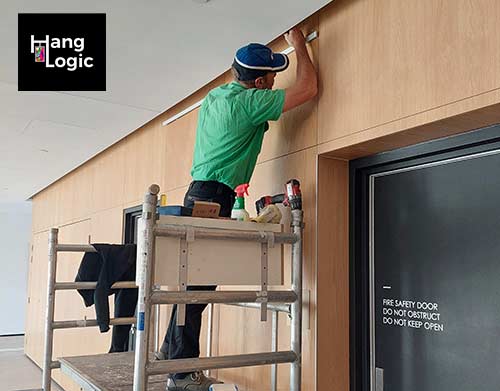
The Artiteq Info Rail is extremely easy to install.
Although you won’t probably require the expertise of an art installer if you are a bit handy, a professional installation of the system is always highly recommended.
The rail itself is attached to the wall by means of heavy-duty Nylon clips, called Click and Connect.
Every time you purchase an Info Rail, a “Fastener Kit” is included in the price. Each Fastener Kit includes a set of:
- Click and Connects
- Screws and wall plug
- End Caps
The Click and Connects are to be screwed onto your walls in a straight line, along the entire length of your info rail. The wall fixtures you use to fix the Click and Connect to the walls will depend on the nature of your walls. Once all the Click and Connects are in place, the Info Rail will simply click on them.
End caps are fixed at both ends of the rail to mask the cross section and create a more elegant and sleeker look for your Info Rail.


You can install the Artiteq Info Rail in four simple steps:
1. Locate the area where you’d like your information to be displayed. Make sure it is well visible by the public and easy for you to access. Corridors are usually one of the best spots, as they collect a high number of passing visitors, so your information has higher chances to be seen!
2. Make sure you decide which height to install your Info Rail, this will depend on the specific requirements. If you are installing the Info Rail in your kitchen, you probably want it to be at about 1.5m from the floor and away from heat sources, direct flames, food or chemical sources of contamination. If you are installing the Info Rail in a classroom, you need to make sure that the rail is installed at a height to allow children to use it if you want them to hang their artworks by themselves. In each case you need to ensure that the Info Rail is installed at a height which allows for maximum visibility, ease of use, and safety, as you don’t want your information to be damaged.
3. Once the height of installation is decided, it is time to inspect your walls. Before installation you should make sure that important services such as water pipes and power lines are away from the area you want to drill in. You can either use your builder’s drawing plans or ask a professional.
You may be wandering what materials your walls are made of?
The most common materials are:
- Plasterboard lined walls: very common in most buildings, both residential and commercial. Bear in mind, plasterboard is not used as a structural element of the building, but only for finishing and insulating purposes. You should never rely on plasterboard strength to hang objects on your walls.
- Brick walls: again, a fairly common type of wall in Australia, both in residential and commercial buildings. A brick wall can either be structural or not. You can find this out by looking at the framing plan of your house. In timber framed and steel framed buildings, brick walls are used for insulator and aesthetics.
- Concrete walls: this is fairly common in commercial buildings only. Concrete is a very sturdy material, which can provide excellent fire protection. However, it is also incredibly hard to drill into.
- Timber: timber walls are sometimes used for aesthetical purposes. They are normally easy to drill in and have good loadbearing capacities as well.
- Stone walls: this scenario is quite possible in some old heritage buildings. However, some kind of stones look very fancy and may be used in modern buildings as well, so it’s not unlikely to find them in new constructions. Stone walls can be tricky: depending on the nature of the rock, they can be either incredibly hard to drill in, or very soft and sandy, therefore not ideal to hold loads. It is not recommended to install Modular Wall displays on these kinds of walls, although ceiling-fixed systems are best used in these cases.

4. Attach your Info Rail to the walls!
You will have to fix the Click and Connect Nylon Clips to the wall, in order to form a straight line. Make sure that the clips are equally spaced, so that the weight of the rail will be uniformly shared among the clips.
How to fix the clips to the wall?
If you have a timber or steel framed building with plasterboard lining, the wall plugs provided in the Fastener Kit are not necessary. Instead, you should detect the studs in the frame by using a stud finder. The studs are hidden by the plasterboard and the stud finder is able to detect them easily. Use a pencil to mark the point where your clip needs to be installed.
It is a good norm to pre-drill into the plasterboard layer. This will provide the screw with an easier access to the stud. You should then use the screws provided in the “Fastener Kit” to secure the clips to the studs.

What if you don’t have a stud occurring right where you need it?
No panic, you can use a plasterboard Wall-Mate instead. Wall-Mates have an helicoidal profile on their outer surface which allow them to be screwed straight into the plasterboard. They also have a hollow body with a threaded surface for the screw to engage in.
It is a good practice to pre-drill the plasterboard to create a neat entry point for the Wall-Mate plug, and that you screw the Wall-Mate into the plasterboard until it is half-millimetre countersunk into the plasterboard surface.

What if I have concrete or brick walls?
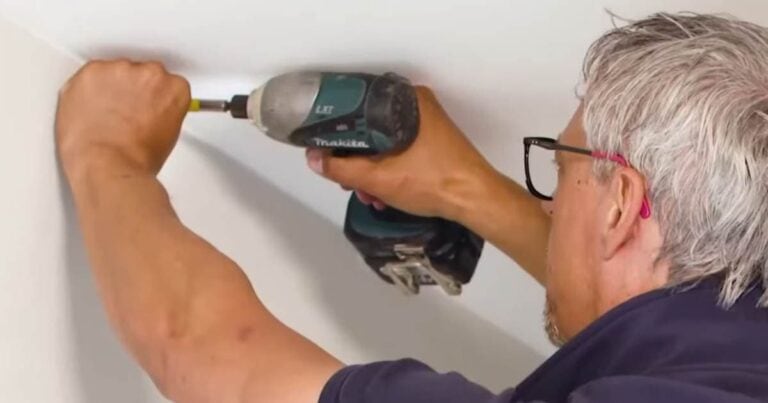
In these cases, you will use both the wall plugs and the screws provided in the Fastener Kit. Similarly, to the method discussed before, you will identify where the Click and Connects are meant to be installed and then drill a hole of a diameter big enough insert the plug using an appropriate drill bit for wall material.
Once the plug is in place, you will fasten the clip to the wall by screwing into the wall plug.

How does the rail attach to the wall?
Once all clips are attached to the wall, in a straight line and equally spaced, all the Artiteq Info Rail clicks easily onto them, using a small rubber mallet if necessary.
You will then be ready for years of tidy, decluttered, modular wall displays, with no wall damage.
Time for an upgrade?
Are you looking to know more about how can you improve the aesthetics and efficiency of your rental property, private home, office, etc.?
Whether you are looking for something simple to keep your walls tidy and unmarked or comprehensive systems to create an impressive art display, we are just a phone call away.
Contact us today by calling us on 0432 924 305 or email us at team@hanglogic.com.au for a FREE consultation. Or, if you prefer to work things out yourself, browse through our frequently asked questions.