-
Australia-Wide Delivery
-
Large Stock Ready
-
Daily Dispatch
Australia-wide delivery - dispatched daily
What is the Best Way to Hang Photos on a Wall

How to hang photos might seem simple, but if you get it just right it will transform your space into a wonderful gallery of memories. Whether you’re working with different-sized frames or creating a photo wall, the right approach can make all the difference. In this guide, we’ll show you how to hang photos on a wall, offering solutions that are not only easy but also professional.
Transitioning from one wall to the next? We’ve got tips that will help you get it right the first time, and the best part is—you won’t have to worry about damaging your walls. Learning how to hang photos properly will save you from unnecessary frustration and ensure that your space looks polished and put together.
Imagine you’ve just hung your artwork, only to realize it doesn’t quite fit the way you imagined. With a hanging system, making adjustments is a breeze—rotate the art, update photos, or add to your collection with ease. Unlike screws, where rearranging means drilling new holes and patching up old ones, a hanging system offers the flexibility to make changes instantly without any hassle or damage to your walls.
How to Hang Photos in Different Sized Frames: The Salon Hang Approach
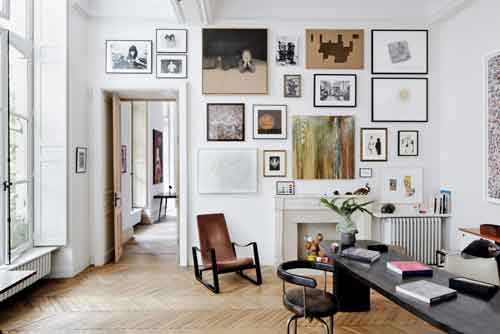
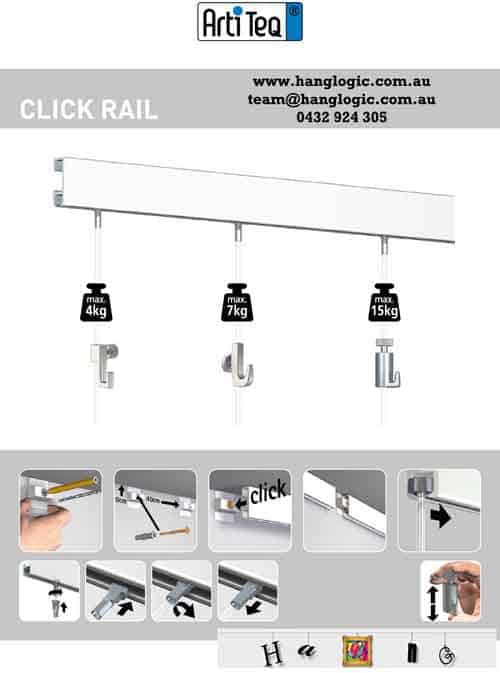
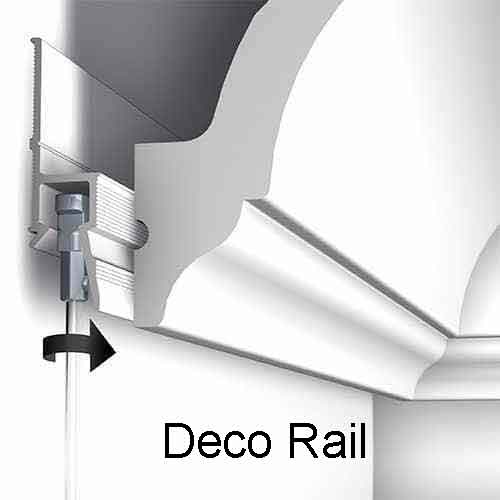
How to hang photos in various sized frames on your walls is more than just a task—it’s an art form known as the Salon Hang. The key to a successful Salon Hang is flexibility, which is why using a picture hanging system like the Artiteq Click Rail or Deco Rail is ideal. These systems allow you to hang multiple pictures evenly or creatively, with zero stress.
Why stick with a static arrangement when you can have the freedom to experiment? With the Artiteq system, you can easily adjust your layout until you’re completely satisfied. Not happy with how it looks? No problem—just redo it without any hassle. This system saves you time, energy, and best of all, preserves your walls.
When thinking about how to hang photos, think of your wall as a canvas. You can create symmetry by placing frames of similar sizes together or mix things up with an eclectic assortment of differently sized frames. The Artiteq Click Rail makes this easy by allowing you to move your hanging wires and hooks to achieve the perfect layout.
A Salon Hang, named after the traditional method of hanging art in 18th-century salons, is all about creating a visually stimulating and dynamic display. Unlike the typical grid pattern, a Salon Hang embraces asymmetry and allows for creativity in arrangement. This style is perfect for those who want to showcase a variety of photos, from family portraits to abstract art, in a way that reflects their personality and style.
Tip: Experiment with different layouts by moving the hanging wires to the left or right along the hanging rail. You can also move the hooks up and down the wire, giving you endless possibilities for your photo arrangements. And if you’re feeling adventurous, try layering frames by hanging some slightly in front of others for added depth. Knowing how to hang photos in this style will add a unique character to your space.
Why the Salon Hang Works:
The beauty of the Salon Hang is its versatility. It works well in both formal and informal settings, making it ideal for living rooms, hallways, and even staircases. The key is to balance the visual weight of your photos—larger frames can anchor the arrangement, while smaller ones add variety and interest.
How to Hang Photos Without Frames: Creative Displays
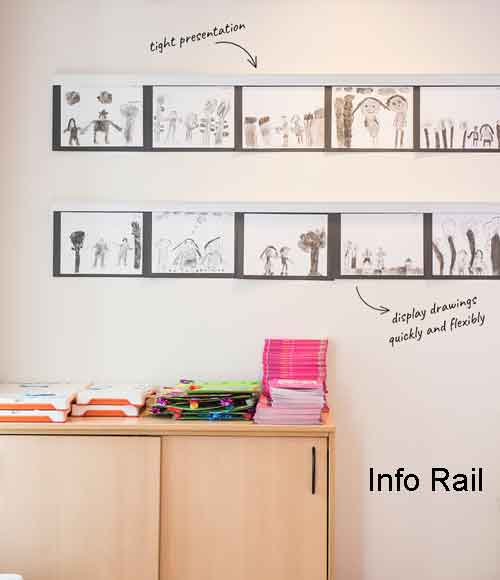
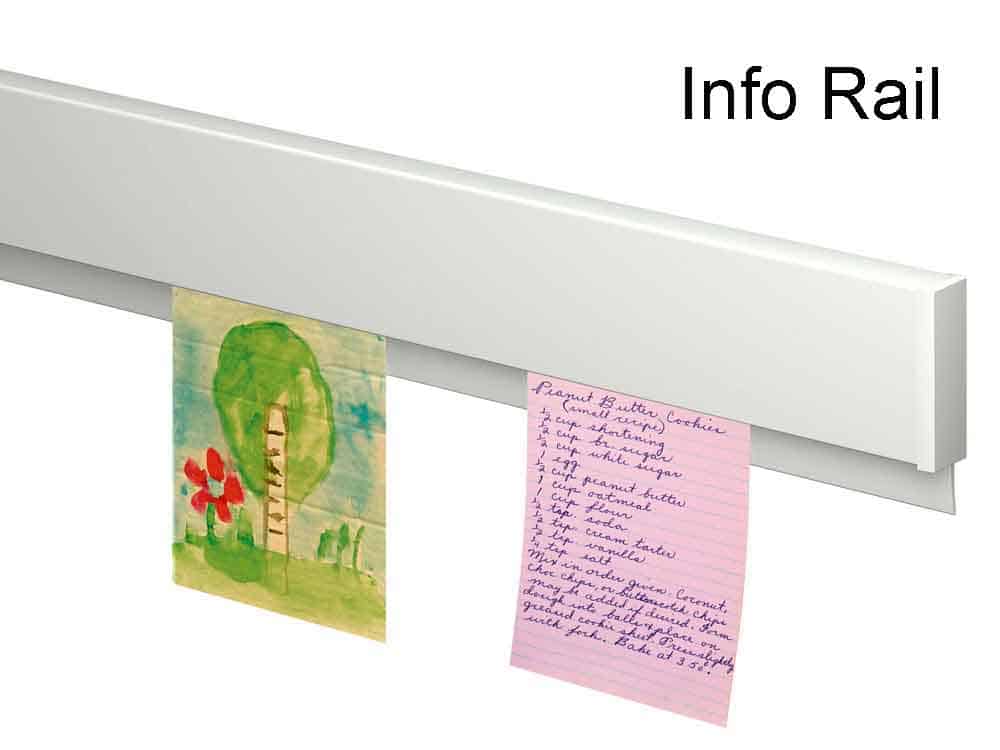
How to hang photos without frames? Not all photos need a frame to make an impact. If you have a collection of unframed photos tucked away, why not display them creatively? The Artiteq Info Rail or Info Strip provides a simple yet stylish solution. These systems allow you to showcase your favorite snapshots in a way that’s easy to update and rearrange.
Unframed photos can add a casual, modern vibe to your space. They’re perfect for creating a more relaxed, dynamic display that can be changed on a whim. The Info Rail is particularly useful in places like kitchens, offices, or kids’ rooms where you might want to swap out photos frequently. The rail system holds the photos securely without damaging them, and since there are no frames, the focus remains entirely on the images.
Transitioning to a new display? These options make it simple to swap out old photos for new ones, keeping your wall fresh and dynamic. Plus, there’s no need for nails or screws, so your walls remain pristine. This is particularly useful for renters or those who frequently change their decor.
Creative Ideas for Unframed Photos:
- Photo Collages: Create a collage of your favourite unframed photos by arranging them in a cluster on your Info Rail. This works especially well with polaroids or small prints.
- Themed Displays: Organize your photos by theme—such as travel, family, or pets—and switch them out seasonally or for special occasions.
- Memory Boards: Incorporate other mementos like postcards, tickets, or notes alongside your photos for a more personalized display.
Tip: Use the Info Rail in a kitchen or office to display everything from family photos to important reminders. It’s a versatile option that blends functionality with style. And if you have kids, this system is perfect for displaying their latest artwork or school photos, with the ability to update the display as often as needed. Understanding how to hang photos creatively without frames can make your home feel more personalized and lived-in.
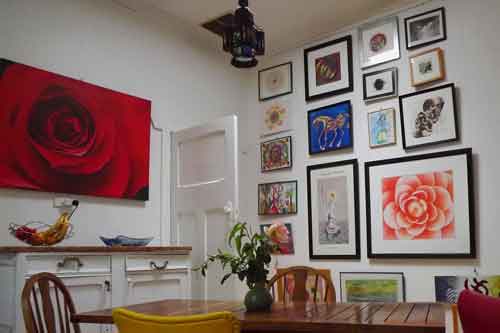
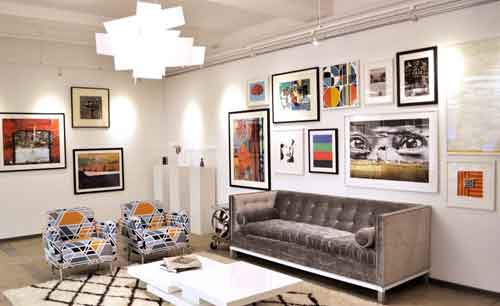
How to Create a Photo Wall: Making a Statement
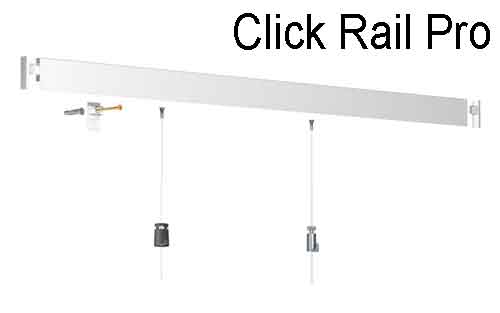
Wondering how to hang photos to create a stunning photo wall? A photo wall can be a striking focal point in any room, but it can also be a daunting task. The last thing you want is to turn your wall into a patchwork of holes. Enter the Click Rail Pro, a robust solution for those looking to create a photo wall without the commitment of nails and screws.
Creating a photo wall involves planning and creativity. Start by selecting a theme or colour scheme that ties your photos together. This could be based on the subject matter, such as family vacations, or a more abstract concept like colour harmony. Once you’ve chosen your photos, lay them out on the floor to experiment with different arrangements.
With the Click Rail Pro, you can hang multiple photos in perfect alignment, and because it’s so easy to adjust, you can refresh your photo wall as often as you like. This system is perfect for office spaces, galleries, or even in a cozy living room. Whether you want a grid pattern for a clean, organized look, or a more free-form arrangement, the Click Rail Pro gives you the flexibility to make it happen.

Tip: Start by planning your layout on the floor before transferring it to the wall. This allows you to play with different arrangements until you find the one that’s just right. Once you’re satisfied, use the Click Rail Pro to bring your vision to life without the fear of making mistakes—you can always adjust as you go.
How to Hang Photos: Final Thoughts and Best Practices
Now that you’ve learned how to hang photos in various settings and with different techniques, it’s time to put these tips into practice. Remember that the key to a successful photo display is flexibility and creativity. Don’t be afraid to experiment with different layouts and styles until you find the one that speaks to you.
When using Artiteq hanging systems, you’ll have the peace of mind that comes with knowing you can easily adjust your display without damaging your walls. Whether you’re creating a formal gallery wall or a casual family photo arrangement, these systems provide the tools you need to achieve a professional and polished look.
Best Practices for Hanging Photos:
- Start with a Plan:
Before you start hanging, take the time to plan your layout. Consider the size, shape, and color of each photo to create a balanced and cohesive display. - Use the Right Tools:
Invest in a quality hanging system like those from Artiteq to ensure your photos are securely and attractively displayed. - Keep It Fresh:
Don’t be afraid to change your display as your tastes and interests evolve. With Artiteq systems, it’s easy to update your photo arrangements without the hassle of drilling new holes. - Consider Your Space:
Tailor your photo display to the specific room or area where it will be featured. Different spaces call for different approaches, so think about how the display will interact with the room’s overall design.
Tip: For the ultimate flexibility, consider creating a rotating photo display. This allows you to showcase different photos throughout the year, keeping your space fresh and engaging.
Conclusion: Just Do It! Hang Your Photos Today
How to hang photos is no longer a mystery—it’s an opportunity to get creative and make your space truly yours. Whether you’re experimenting with different-sized frames, opting for a frameless display, or going all-in on a photo wall, the right tools can make all the difference. With Artiteq hanging systems, you have the flexibility to design your wall exactly how you want it, and the freedom to change it up whenever you like. Visit Hang Logic to learn more !
Solutions we recommend
-

Info Rail
Price range: $57.75 through $179.85Slide in paper, card easily
Select options This product has multiple variants. The options may be chosen on the product page -
Card Rail for Photo Display
$62.60Slot-style vertical rail for cards, photos
-
Deco Rail White Primer 200cm
$34.10Rail vanishes, hanging stays flexible
-
Click Rail Picture Rail
Price range: $25.58 through $91.77Slimline picture rail | 10 year warranty | 30 kg/m
Select options This product has multiple variants. The options may be chosen on the product page


